Introduction
Welcome to LabEx! This is your first C lab, where you'll take your initial steps into the world of C programming. Don't worry if you're completely new to this - we'll guide you through every step.
In this lab, you'll learn how to:
- Write and run your first C program
- Use basic output in C
- Work with a simple variable
These fundamental skills will start your journey into C programming. Let's begin!
Click the Continue button below to begin the lab.
Your First C Program
Let's start with the traditional first program for any programmer - "Hello, World!". This simple program will help you understand the basic structure of a C program.
First, we need to open our WebIDE. Look for the "WebIDE" button on your LabEx interface and click it. This will open a VS Code-like environment where we'll write our C code.
Once the WebIDE is open, follow these steps:
- In the left sidebar, you'll see a file explorer. Right-click in this area and select "New File".
- Name the file
hello.c. The.cextension tells the IDE that this is a C file. - Click on the new
hello.cfile to open it in the editor.
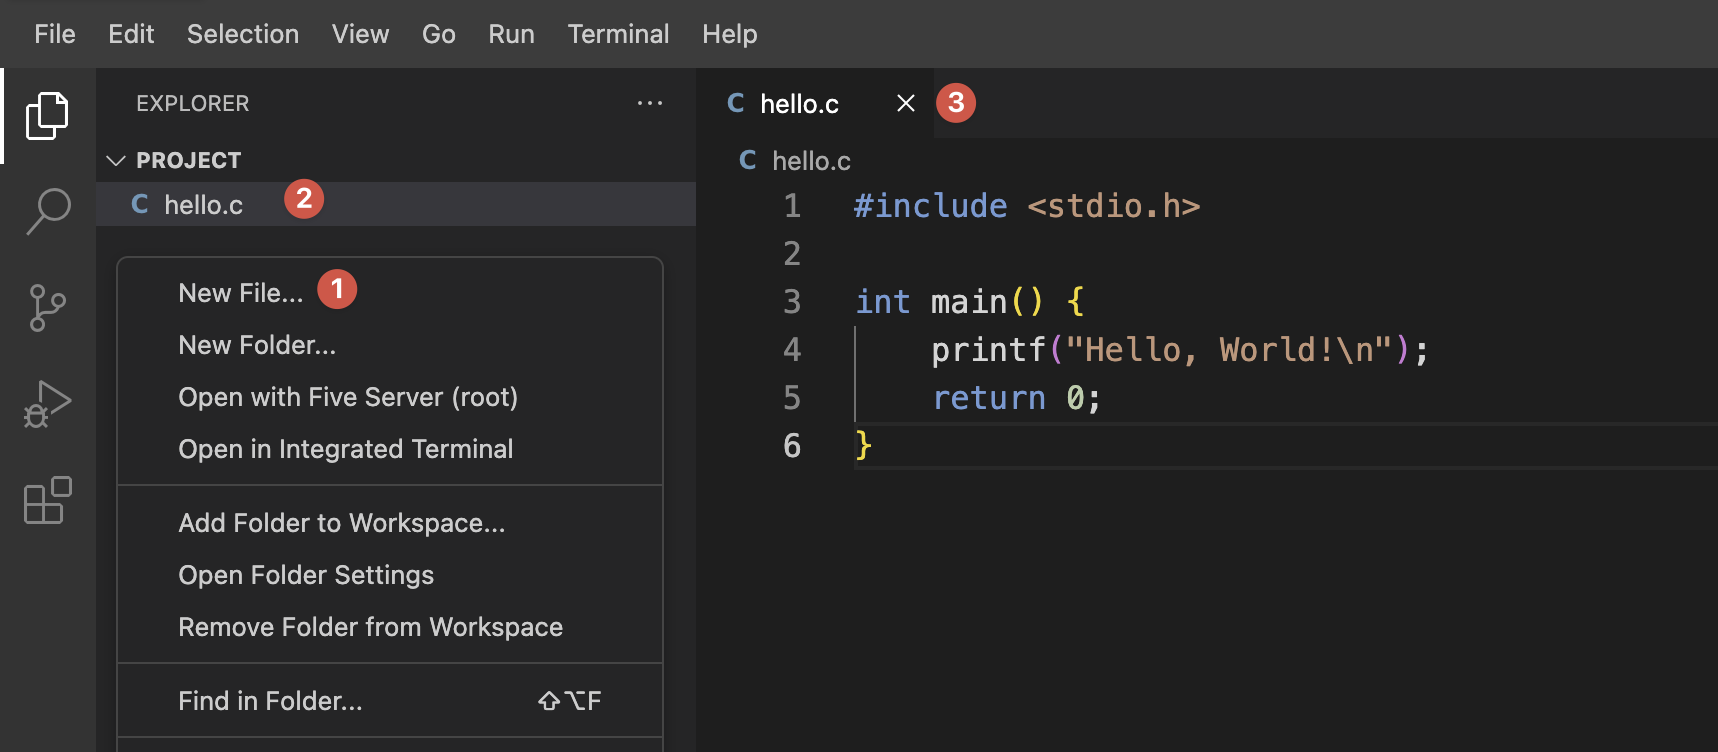
Now, let's write our first C program. Copy and paste the following code into your hello.c file:
#include <stdio.h>

int main() {
    printf("Hello, World!\n");
    return 0;
}
Let's break down this code:
#include <stdio.h>: This line tells the computer to use a pre-written code that allows us to input and output information. Think of it like importing a tool we need to use.int main() { ... }: This is where our program starts. Everything inside the curly braces{ }is what our program will do. Every C program needs amainfunction.printf("Hello, World!\n");: This line tells the computer to print "Hello, World!" to the screen.printfis a function that sends text to the screen.- The
\nat the end of the text moves to a new line after printing, like pressing Enter on your keyboard.
return 0;: This tells the computer our program has finished successfully. It's like saying "We're done here!"
To run this program:
- Open the terminal in your WebIDE (usually at the bottom of the screen).
- In the terminal, type the following commands:
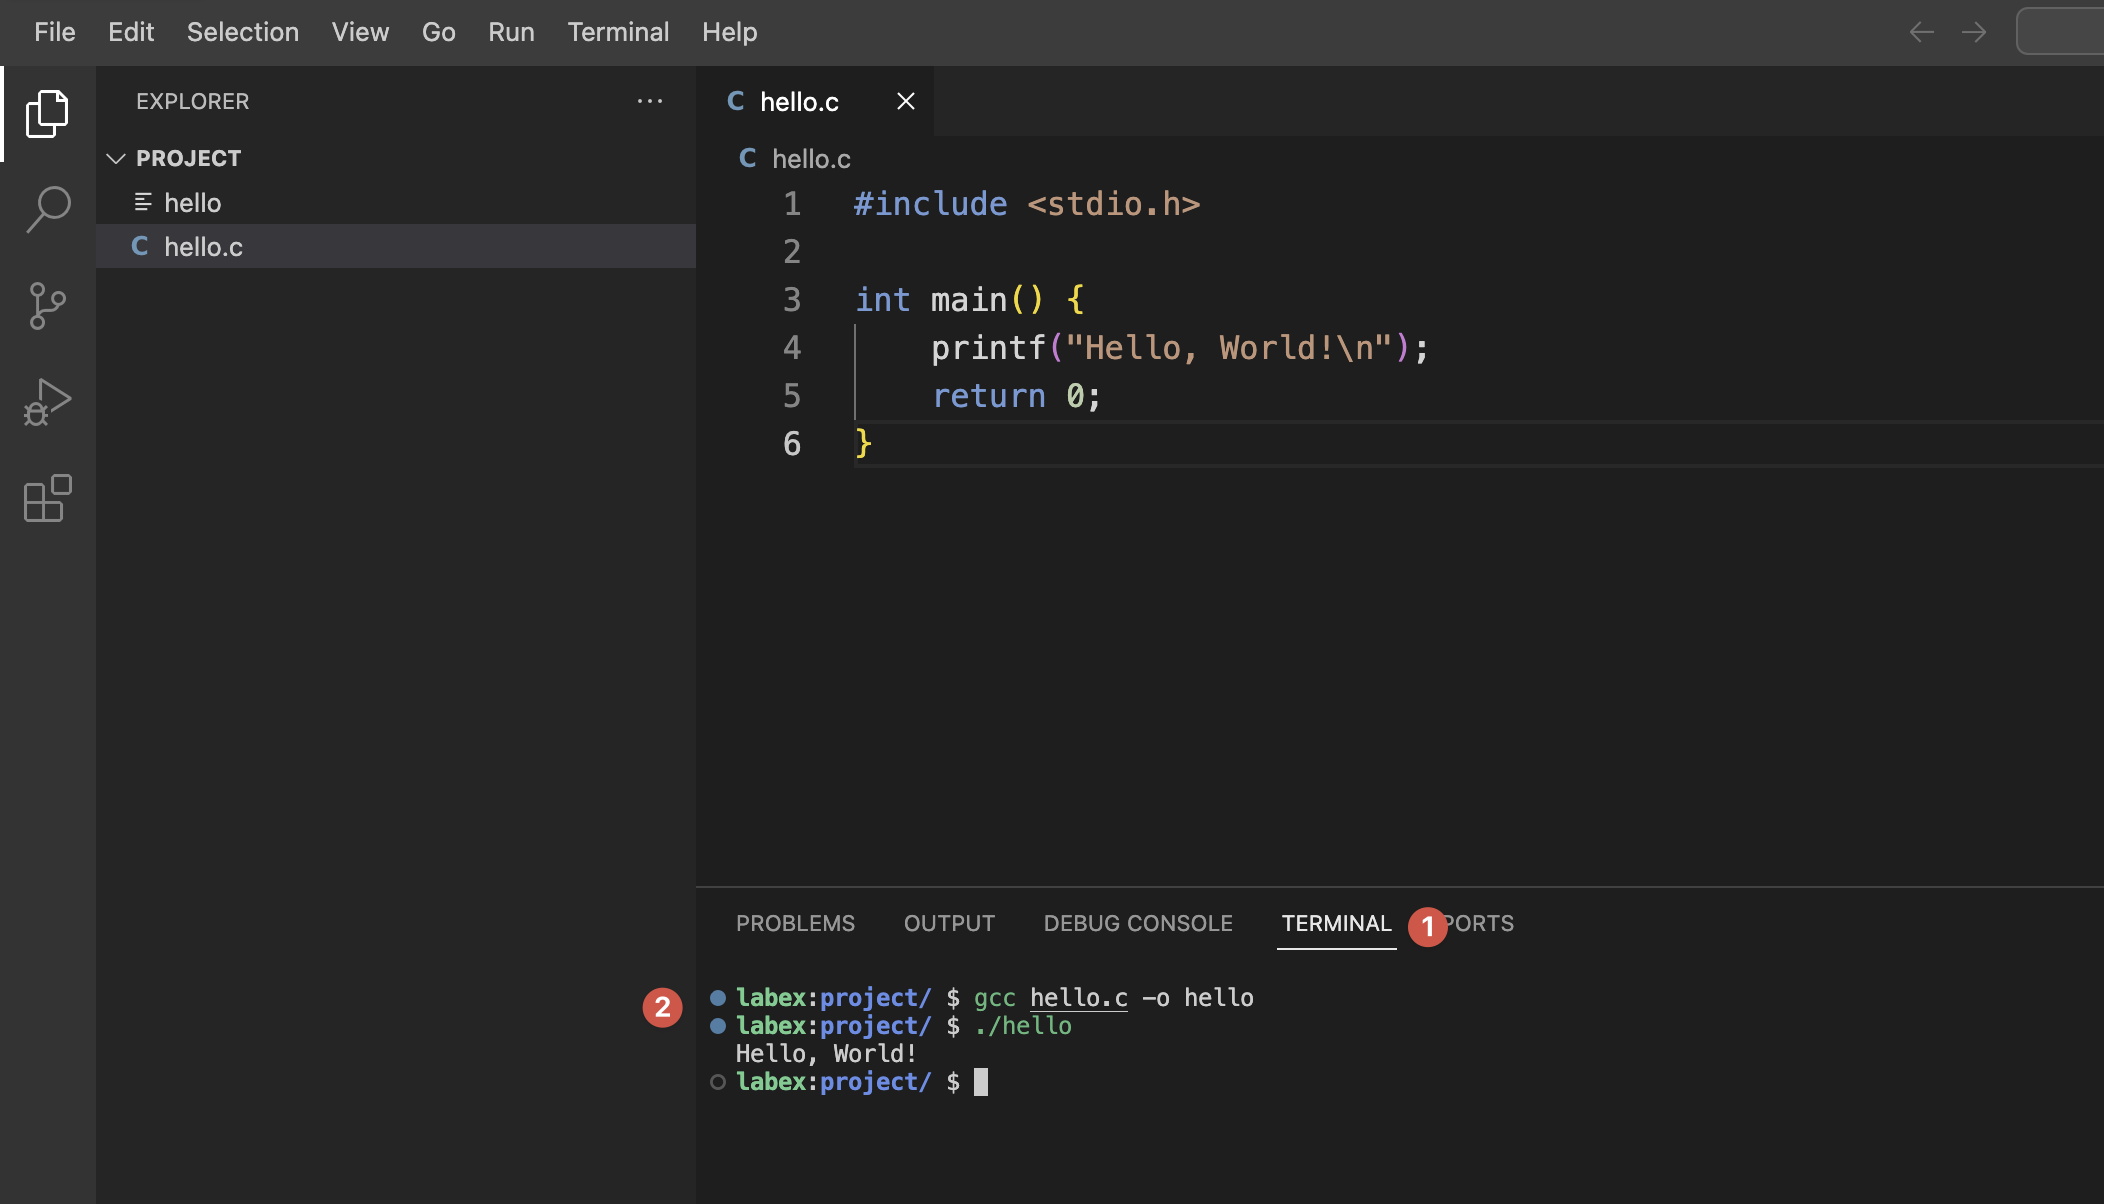
gcc hello.c -o hello
./hello
The first command (gcc hello.c -o hello) prepares your program to run. It's called "compiling" and it translates your C code into a language the computer can understand. The -o hello part names the resulting program "hello".
The second command (./hello) actually runs your program. The ./ tells the computer to look in the current folder for the program.
You should see "Hello, World!" printed in the terminal. If you don't, don't worry! Check these common issues:
- Make sure you saved your
hello.cfile after pasting the code. - Check that you typed the commands exactly as shown, including the
./beforehello. - If you see any error messages, read them carefully. They often give clues about what went wrong.
Congratulations! You've just written and run your first C program.
Adding More Output
Now that we've got our first program running, let's expand it a bit. We'll modify our program to print multiple lines. This will show you how easy it is to add more output to your programs.
Open your hello.c file in the WebIDE. You can do this by clicking on the file name in the file explorer on the left side of the screen.
Replace the contents of hello.c with this new code:
#include <stdio.h>

int main() {
    printf("Hello, World!\n");
    printf("Welcome to C programming!\n");
    printf("This is your first C lab.\n");
    return 0;
}
This program uses printf three times to print three different lines. Let's break down what's new:
- We've added two more
printflines, each ending with\n. - The
\nat the end of each string moves to a new line. This is why each message will appear on a separate line when we run the program. - Notice how each line ends with a semicolon (
;). In C, we use semicolons to show where each instruction ends.
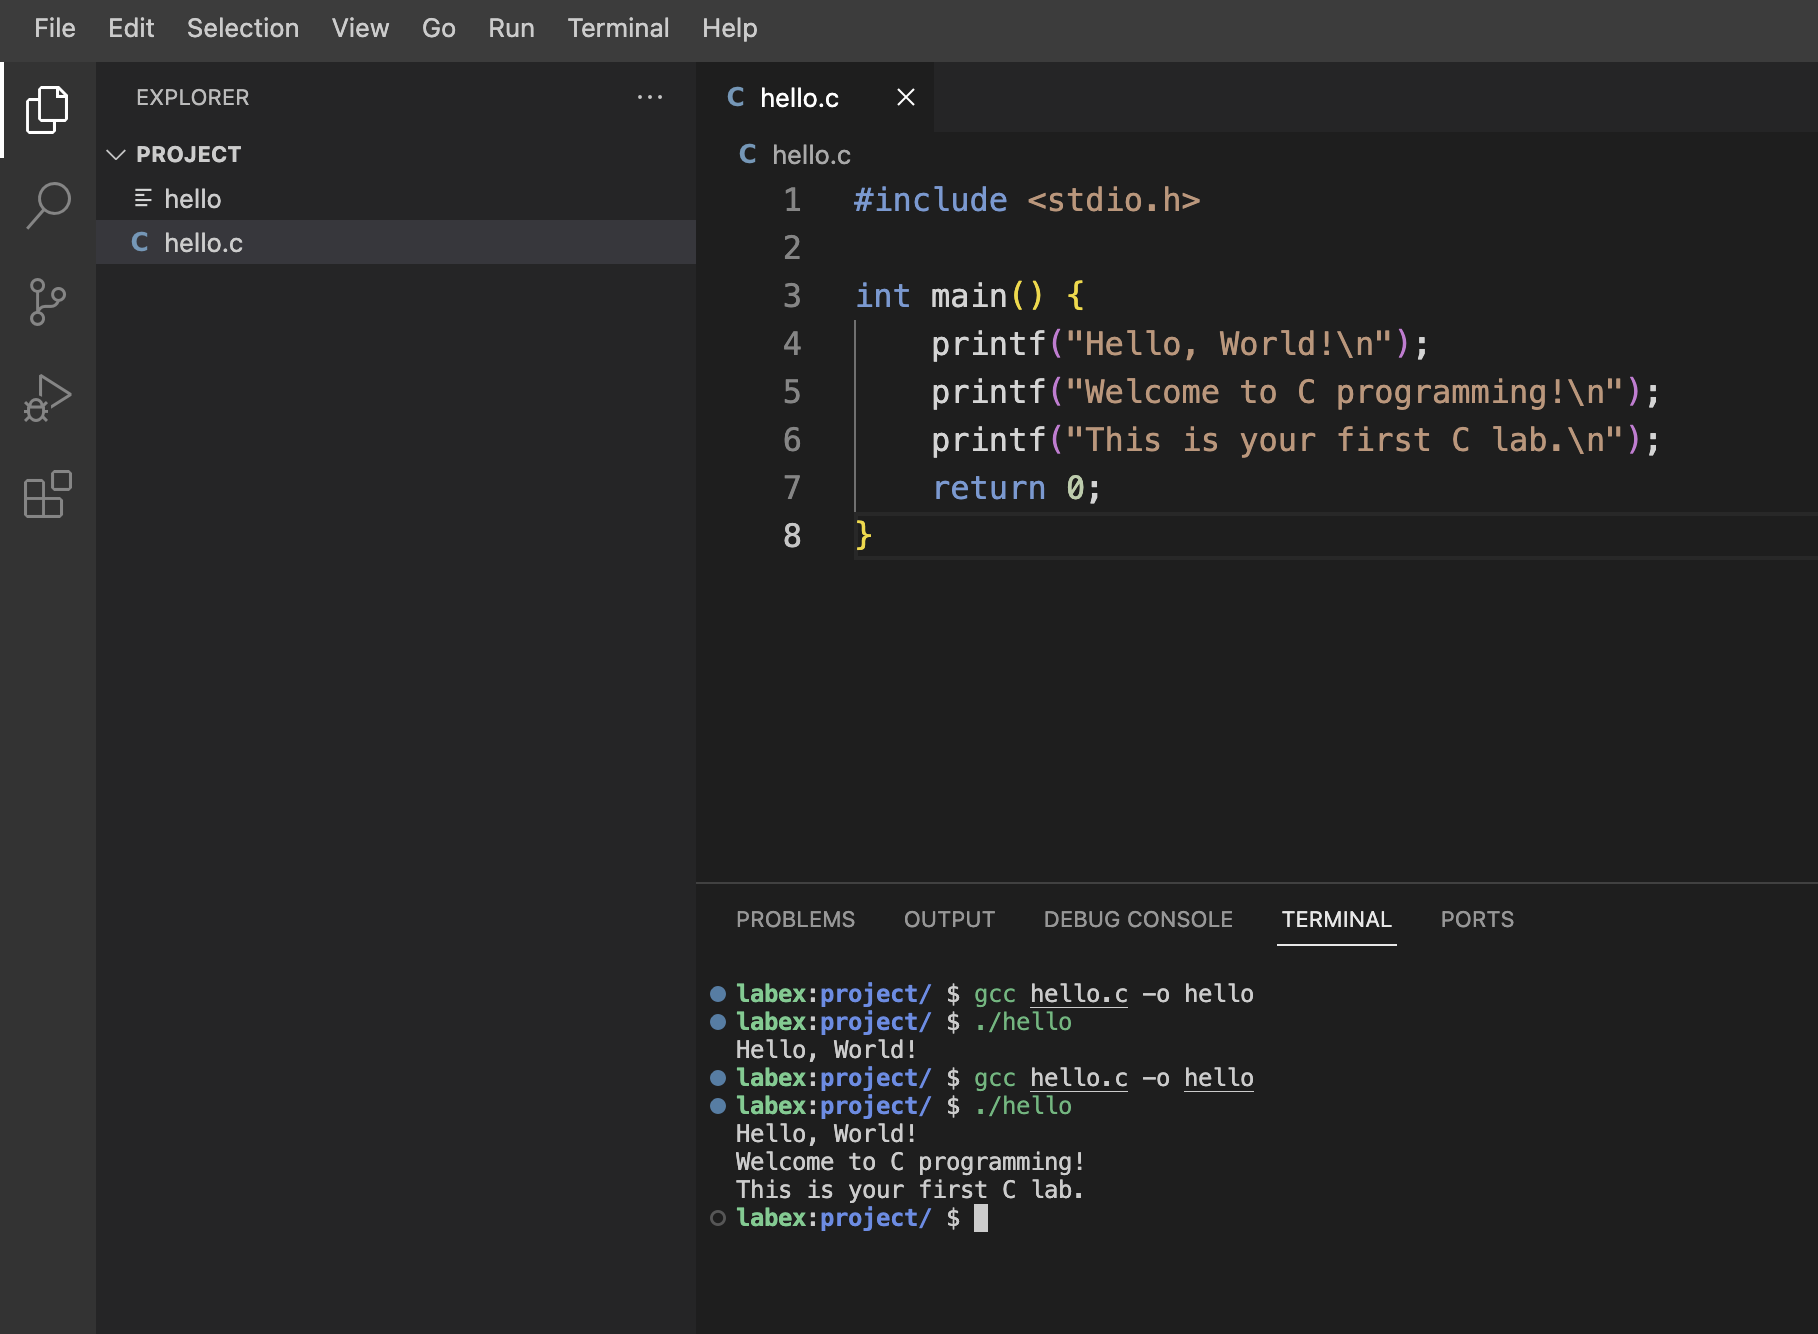
Compile and run the program using the same commands as before:
gcc hello.c -o hello
./hello
You should now see three lines of text printed in the terminal. If you don't see all three lines, here are some things to check:
- Make sure you saved the file after making changes.
- Check that each line ends with
\ninside the quotation marks. - Look for any missing semicolons at the end of the
printflines.
This demonstrates how you can use multiple printf statements to print several lines of text. You can add as many lines as you want using this method!
Using a Simple Variable
For our final step, let's introduce the concept of variables. A variable is like a labeled box where we can store information. In this case, we'll use a variable to store a name, which we'll then use in our greeting.
Create a new file in your WebIDE and name it greeting.c. Here's how:
- Right-click in the file explorer (left sidebar) and select "New File".
- Name the new file
greeting.c. - Click on
greeting.cto open it in the editor.
Then, copy and paste the following code:
#include <stdio.h>

int main() {
    char name[] = "LabEx";
    printf("Hello, %s!\n", name);
    printf("Welcome to C programming, %s!\n", name);
    return 0;
}
This program introduces a few new concepts:
char name[] = "LabEx";: This creates a variable callednameand stores the text "LabEx" in it.char[]tells C thatnamewill hold a series of characters (text).- You can change "LabEx" to any name you like!
- We use the
namevariable in ourprintfstatements to personalize our messages.- Notice how we use
%sin the text and then, nameat the end ofprintf. This tells C to insert the value ofnamewhere%sappears.
- Notice how we use
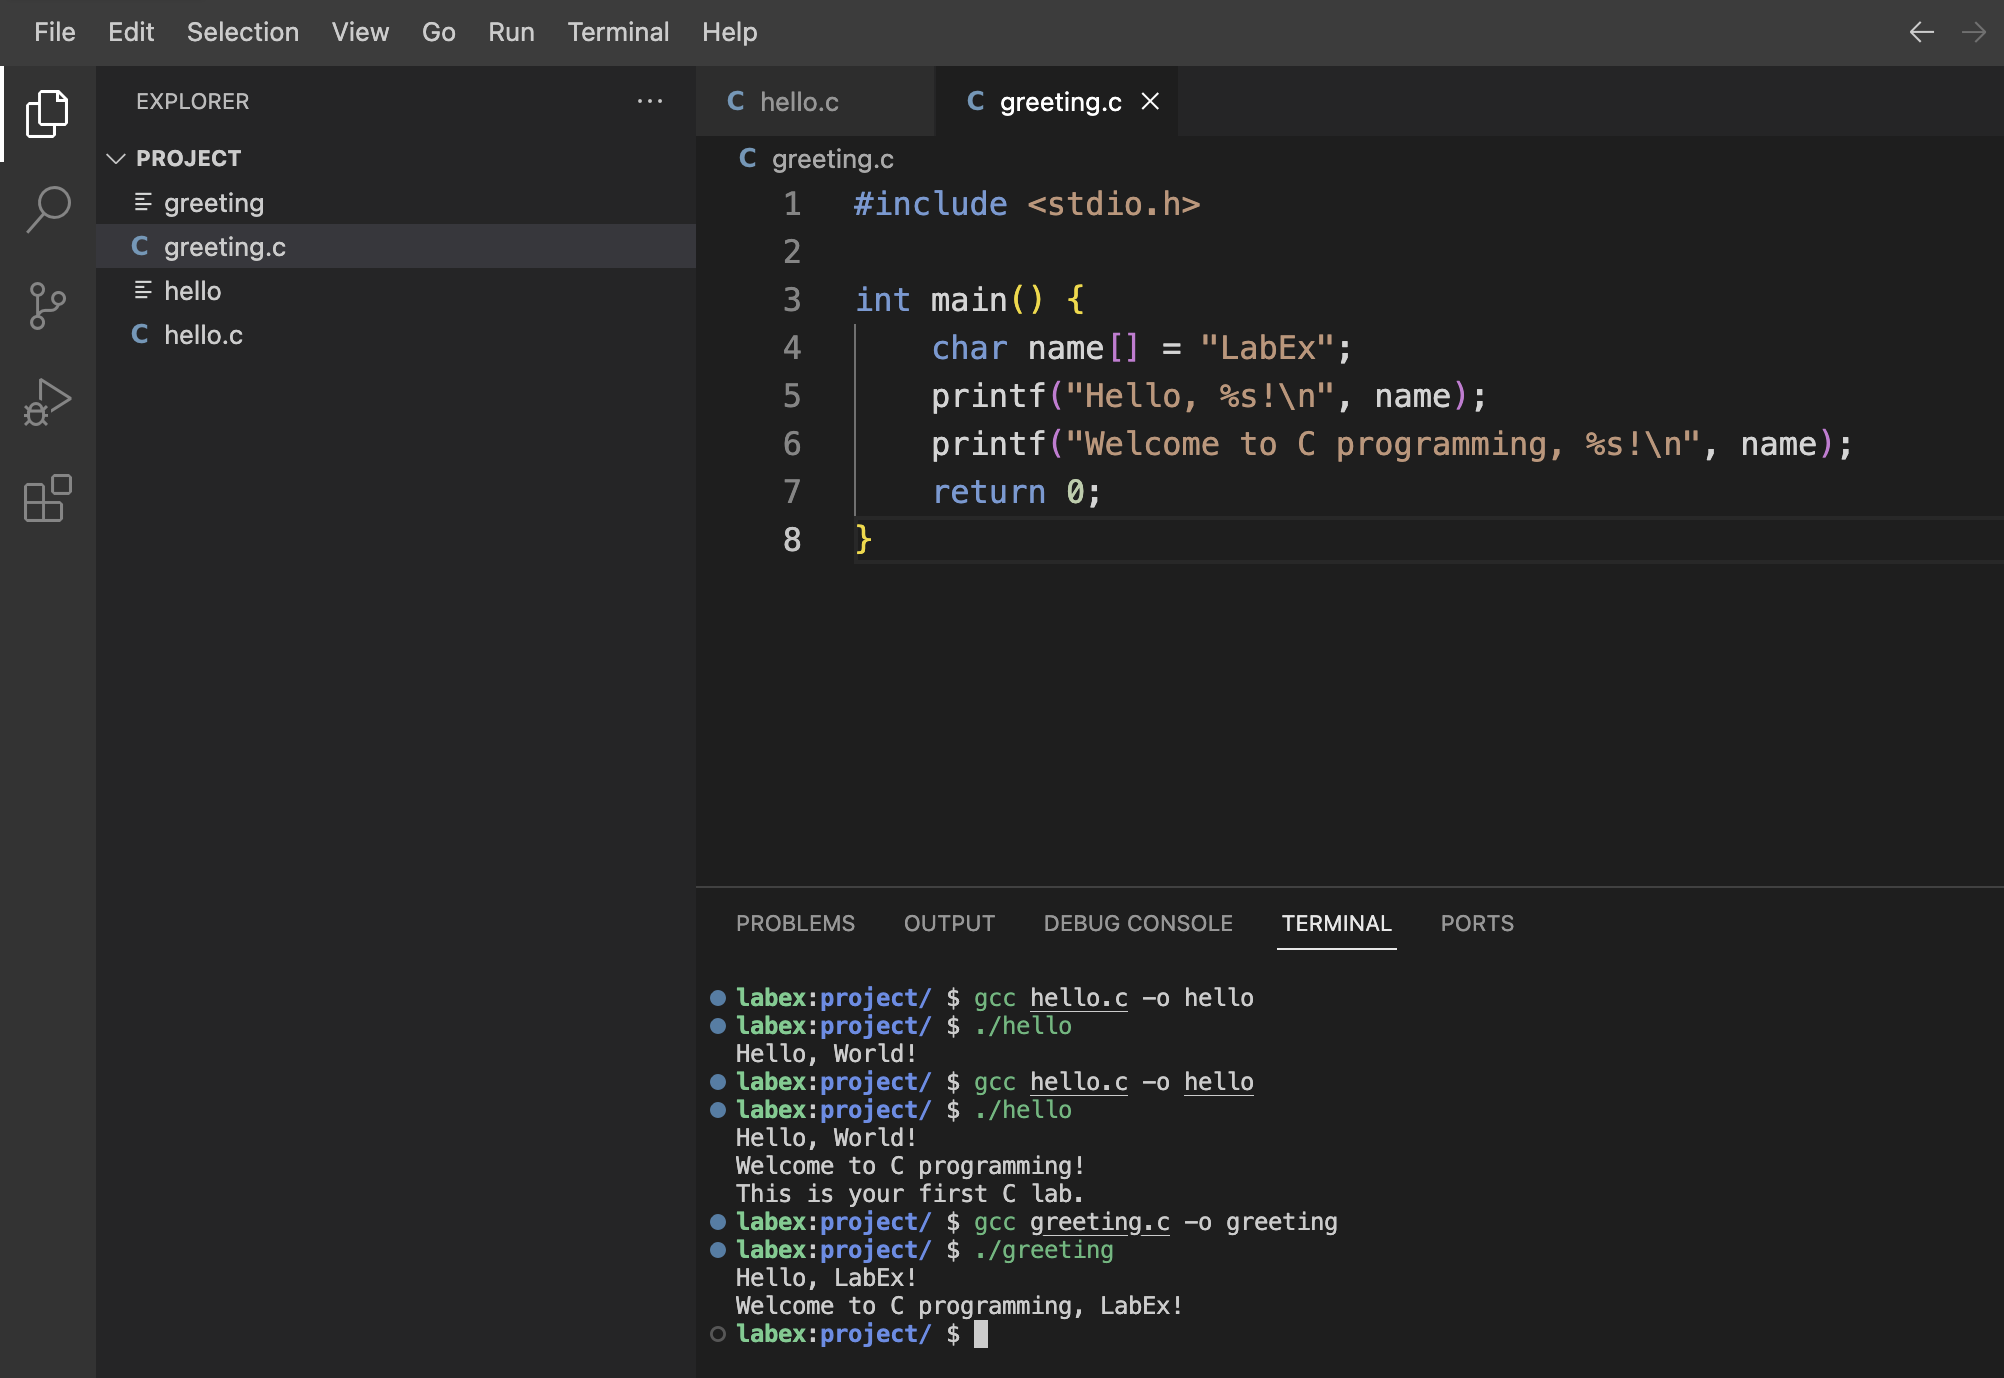
Compile and run the program:
gcc greeting.c -o greeting
./greeting
You should see personalized greeting messages in the terminal. If you changed "LabEx" to a different name, you'll see that name in the output.
If you're not seeing the expected output, here are some things to check:
- Make sure you've saved the
greeting.cfile after pasting the code. - Check that you've typed the compilation command correctly:
gcc greeting.c -o greeting(note that we're usinggreeting.candgreetinghere, nothello.candhello). - Ensure that the
namevariable is defined before it's used in theprintfstatements.
Try changing the name in the name[] = "LabEx"; line to your own name, then compile and run the program again. You'll see how variables allow us to easily change parts of our program!
Summary
Congratulations! You've completed your first C Lab and taken your first steps into the world of C programming. Let's recap what you've learned:
How to write and run a basic C program
- You learned about the structure of a C program, including the
main()function. - You used
gccto compile your code and./to run the resulting program.
- You learned about the structure of a C program, including the
How to use
printfto display output- You used
printfto print messages to the screen. - You learned about
\nto move to a new line after printing.
- You used
How to use multiple
printfstatements to print several lines- You saw how easy it is to add more output to your program.
How to use a simple character array variable to store and display text
- You learned how to create a
char[]variable and give it a value. - You saw how to use a variable in your
printfstatements to personalize output.
- You learned how to create a
These are the building blocks of C programming. You've made an excellent start!
Remember, learning to program is a journey, and you've just taken your first steps. Here are some tips as you continue learning:
- Don't be afraid to experiment! Try changing the text in your
printfstatements or the value of yournamevariable. - If you encounter errors, read the error messages carefully. They often provide clues about what went wrong.
- Practice is key. Try writing small programs that use what you've learned here.
Your next adventure in C is just around the corner. Keep coding, and have fun exploring the world of C!