Introducción
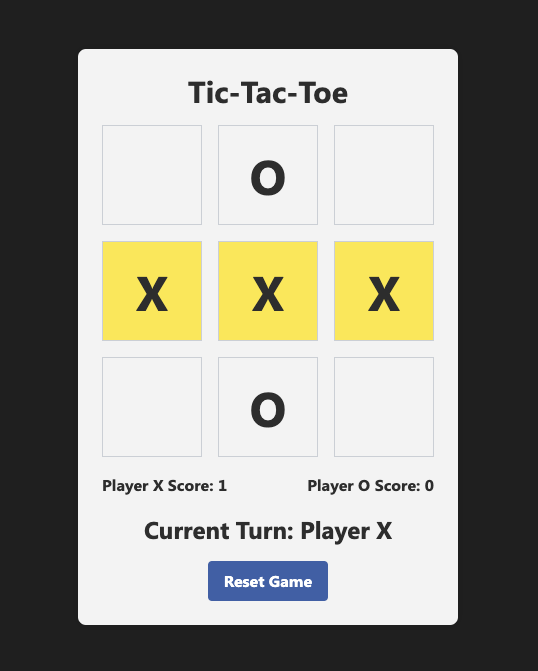
En este proyecto, aprenderás a crear un juego de Tres en Raya (Tic-Tac-Toe) utilizando HTML, CSS y JavaScript. El Tres en Raya es un juego para dos jugadores donde se turnan para marcar X o O en una cuadrícula de 3x3. El objetivo es conseguir tres marcas en línea, ya sea horizontal, vertical o diagonalmente. Crearás los archivos HTML, CSS y JavaScript necesarios e implementarás la lógica del juego paso a paso.
👀 Vista previa
🎯 Tareas
En este proyecto, aprenderás:
- Cómo configurar la estructura básica del juego de Tres en Raya usando HTML.
- Cómo añadir estilos CSS para definir la apariencia de los elementos del juego.
- Cómo implementar la lógica del juego usando JavaScript.
- Cómo gestionar las interacciones del usuario, comprobar victorias o empates y actualizar las puntuaciones.
- Cómo renderizar el tablero de juego y actualizar el indicador de turno.
- Cómo permitir que los jugadores reinicien el juego y comiencen una nueva ronda.
🏆 Logros
Después de completar este proyecto, serás capaz de:
- Estructurar un archivo HTML para una aplicación web.
- Aplicar estilos a elementos mediante clases CSS.
- Implementar lógica de juego usando JavaScript.
- Gestionar las interacciones del usuario y actualizar la interfaz en consecuencia.
- Renderizar el tablero de juego y actualizar el indicador de turno.
- Crear escuchadores de eventos (event listeners) y gestionar eventos en JavaScript.
Crear el archivo HTML
Crea un nuevo archivo llamado index.html y añade el siguiente código.
cd ~/project
touch index.html
Este código establece la estructura básica del juego de Tres en Raya.
<!doctype html>
<html lang="en">
  <head>
    <meta charset="UTF-8" />
    <meta name="viewport" content="width=device-width, initial-scale=1.0" />
    <title>Tic-Tac-Toe</title>
    <link
      href="https://cdn.jsdelivr.net/npm/tailwindcss@2.2.19/dist/tailwind.min.css"
      rel="stylesheet"
    />
    <style>
      /* CSS styles for the game */
    </style>
  </head>

  <body>
    <div id="app">
      <h1 class="text-3xl font-bold mb-4 text-gray-900">Tic-Tac-Toe</h1>
      <div id="board" class="grid grid-cols-3 gap-4 mb-4">
        <!-- Game board cells -->
      </div>
      <div id="scoreboard" class="flex justify-between items-center mb-4">
        <!-- Player scores -->
      </div>
      <div
        id="turn-indicator"
        class="text-2xl font-bold mb-4 text-gray-900"
      ></div>
      <button
        id="reset-button"
        class="bg-blue-500 hover:bg-blue-700 text-white font-bold py-2 px-4 rounded"
      >
        Reset Game
      </button>
    </div>

    <script>
      // JavaScript code for the game logic
    </script>
  </body>
</html>
Añadir estilos CSS
Dentro de la etiqueta <style> en la sección <head> del archivo HTML, añade los estilos CSS necesarios para el juego. Estos estilos definen la apariencia de elementos como el tablero, las celdas, las puntuaciones y los botones.
<style>
  .board-cell {
    width: 100px;
    height: 100px;
  }

  body {
    display: flex;
    flex-direction: column;
    align-items: center;
    justify-content: center;
    height: 100vh;
    background-color: #222;
    font-family: "Segoe UI", Tahoma, Geneva, Verdana, sans-serif;
  }

  #app {
    text-align: center;
    background-color: #f5f5f5;
    border-radius: 8px;
    padding: 24px;
    box-shadow: 0 0 10px rgba(0, 0, 0, 0.1);
  }

  h1 {
    font-size: 32px;
    color: #333;
  }

  .text-gray-900 {
    color: #333 !important;
  }

  .text-2xl {
    font-size: 24px;
  }

  .bg-blue-500 {
    background-color: #4267b2;
  }

  .bg-blue-500:hover {
    background-color: #3b5ca0;
  }

  .bg-blue-700 {
    background-color: #385898;
  }

  .text-white {
    color: #fff !important;
  }

  .rounded {
    border-radius: 4px;
  }

  .highlight {
    background-color: #ffed4a;
  }
</style>
También puedes añadir un archivo style.css al proyecto y vincularlo al archivo HTML usando la etiqueta <link>.
<link rel="stylesheet" href="style.css" />
Elige el método que prefieras.
Añadir el código JavaScript de la lógica del juego
Dentro de la etiqueta <script> al final del archivo HTML, añade el código JavaScript que gestiona la lógica del juego. Este código realiza el seguimiento del estado del juego, gestiona las interacciones del usuario, comprueba si hay victoria o empate, actualiza las puntuaciones y renderiza el tablero.
<script>
  // Game logic code
</script>
Inicializar las variables del juego
Declara las variables necesarias al principio del código JavaScript. Estas variables almacenarán el estado del juego, las puntuaciones de los jugadores y otra información relevante.
// Game logic
const board = ["", "", "", "", "", "", "", "", ""];
let currentPlayer = "X";
let gameEnded = false;
let playerXScore = 0;
let playerOScore = 0;
let winningCells = [];
Gestionar el clic en las celdas
Crea una función llamada handleCellClick que se ejecutará cuando se haga clic en una celda del tablero. Esta función gestionará la lógica principal del juego, como actualizar el tablero, comprobar si hay victoria, actualizar las puntuaciones y cambiar el jugador actual.
function handleCellClick(index) {
  if (gameEnded || board[index] !== "") return;
  board[index] = currentPlayer;
  renderBoard();

  if (checkWin()) {
    updateScore();
    highlightWinningCells();
    alert(`Player ${currentPlayer} wins!`);
    gameEnded = true;
  } else if (board.every((cell) => cell !== "")) {
    alert("It's a tie!");
    gameEnded = true;
  } else {
    currentPlayer = currentPlayer === "X" ? "O" : "X";
    updateTurnIndicator();
  }
}
Comprobar si hay victoria
Crea una función llamada checkWin que verifique si existe una condición de victoria en el tablero. Esta función compara los valores en el array board con las combinaciones ganadoras para determinar si un jugador ha ganado.
function checkWin() {
  const winningCombinations = [
    [0, 1, 2],
    [3, 4, 5],
    [6, 7, 8],
    [0, 3, 6],
    [1, 4, 7],
    [2, 5, 8],
    [0, 4, 8],
    [2, 4, 6]
  ];

  for (let i = 0; i < winningCombinations.length; i++) {
    const [a, b, c] = winningCombinations[i];
    if (board[a] !== "" && board[a] === board[b] && board[a] === board[c]) {
      winningCells = [a, b, c];
      return true;
    }
  }
  return false;
}
Reiniciar el juego
Crea una función llamada resetGame que restablezca el estado del juego a sus valores iniciales. Esta función se llama cuando se hace clic en el botón de reinicio, limpia el tablero, restablece el jugador actual, limpia las celdas ganadoras, actualiza el indicador de turno y renderiza el tablero.
function resetGame() {
  board.fill("");
  currentPlayer = "X";
  gameEnded = false;
  winningCells = [];
  updateTurnIndicator();
  renderBoard();
}
Actualizar las puntuaciones de los jugadores
Crea una función llamada updateScore que actualice las puntuaciones de los jugadores. Esta función se llama cuando un jugador gana una partida. Incrementa la puntuación del jugador correspondiente y actualiza la visualización de la puntuación en la página.
function updateScore() {
  if (currentPlayer === "X") {
    playerXScore++;
    document.getElementById("player-x-score").textContent = playerXScore;
  } else {
    playerOScore++;
    document.getElementById("player-o-score").textContent = playerOScore;
  }
}
Actualizar el indicador de turno
Crea una función llamada updateTurnIndicator que actualice el indicador de turno en la página para mostrar de quién es el turno actual.
function updateTurnIndicator() {
  const turnIndicator = document.getElementById("turn-indicator");
  turnIndicator.textContent = `Current Turn: Player ${currentPlayer}`;
}
Resaltar las celdas ganadoras
Crea una función llamada highlightWinningCells que añada una clase de resaltado a las celdas ganadoras en el tablero. Esta función se llama cuando un jugador gana la partida.
function highlightWinningCells() {
  const cells = document.querySelectorAll(".board-cell");
  cells.forEach((cell, index) => {
    if (winningCells.includes(index)) {
      cell.classList.add("highlight");
    }
  });
}
Renderizar el tablero de juego
Crea una función llamada renderBoard que actualice el tablero de juego en la página según el estado actual del array board. Esta función se llama después de cada movimiento del jugador para actualizar la interfaz visual.
function renderBoard() {
  const cells = document.querySelectorAll(".board-cell");
  cells.forEach((cell, index) => {
    cell.textContent = board[index];
    cell.classList.remove("highlight");
  });
}
Añadir escuchadores de eventos
Añade escuchadores de eventos a las celdas del tablero y al botón de reinicio. Estos escuchadores llaman a las funciones correspondientes cuando ocurren los eventos.
// Event listeners
const cells = document.querySelectorAll(".board-cell");
cells.forEach((cell, index) => {
  cell.addEventListener("click", () => handleCellClick(index));
});

const resetButton = document.getElementById("reset-button");
resetButton.addEventListener("click", resetGame);
Renderizado inicial
Al final del código JavaScript, añade el código para el renderizado inicial. Este código configura el estado inicial del juego, actualiza el indicador de turno y renderiza el tablero.
// Initial render
updateTurnIndicator();
renderBoard();
Ejecutar el proyecto
¡Ya puedes ejecutar el proyecto y jugar al Tres en Raya!
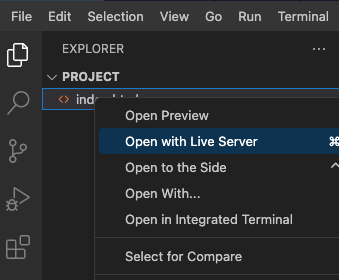
Haz clic en el botón Go Live en la esquina inferior derecha del WebIDE para ejecutar el proyecto.
Esto abrirá el proyecto en la pestaña Web 8080.
Haz clic en las celdas para realizar tus movimientos y pulsa el botón de reinicio para comenzar una nueva partida.
Resumen
¡Felicidades! Has creado con éxito un juego de Tres en Raya utilizando HTML, CSS y JavaScript. El proyecto cubrió la creación del archivo HTML, la adición de estilos CSS, la implementación de la lógica del juego y la gestión de las interacciones del usuario. El juego permite que dos jugadores se turnen, comprueba si hay victoria o empate, actualiza las puntuaciones y resalta las celdas ganadoras. ¡Ya puedes ejecutar el proyecto y disfrutar jugando al Tres en Raya!